How to reverse engineer malicious RTF files
How to find and decompile malicious code in RTF files.
by André Eichhofer
Happy day,
this post is part of the RTF series. Last time we examined how to create malicious RTF files for phishing attacks. This time we’ll look into how to reverse engineer them and how to analyze binary data streams.
In the last post we created a sample RTF that contains a binary stream that would trigger Calculator once you open it. We will take this as an example example for how to disassemble an RTF and how to decompile binary streams.
Assume you have isolated such an RTF file. The first step is to look inside the file and confirm the file type.
When you look at the first lines with head file.rtf you recognize the RTF headers.
{\rtf1\ansi\deff0
{\fonttbl{\f0\fswiss Arial;}}
{\colortbl;\red0\green0\blue0;\red255\green255\blue255;}
\viewkind4\uc1\pard\f0\fs20 \par
...
...
You can double check the file type using file file.rtf
file.rtf: Rich Text Format data, version 1, ANSINow, let’s inspect the first 100 lines:
\viewkind4\uc1\pard\f0\fs20 \par
\objclass "Packager"
\objdata
4d5a90000300000004000000ffff0000b800000000000000400000000000
000000000000000000000000000000000000000000000000000000000000
800000000e1fba0e00b409cd21b8014ccd21546869732070726f6772616d
2063616e6e6f742062652072756e20696e20444f53206d6f64652e0d0d0a
24000000000000005045000064861200ac9fae6a00620100b1050000f000
26000b02022c001a0000001c000000020000201400000010000000000040
You clearly see that there is a hexcode after the \objdata keyword. This indicates that the RTF embeds a binary stream. Assume an attacker would have embedded shellcode. You would not detect an IP or other hints by simply looking at the contents of this RTF.
Extract binary streams from RTF files
Binary data is often embedded as so called OLE objects (Object Linking and Embedding) in Microsoft Office files. An OLE object is a container that can hold other files, such as binaries.
There is a wonderful toolset to detect and extract OLE containers, called Oletools. Included is a tool named rtfobj that can be used to break up our RTF.
Use rtfobj file.rtf to show OLE containers.
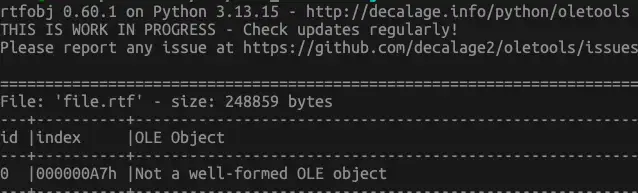
Now, that we’ve discovered the OLE container, we will extract it using rtfobj file.rtf -s 0.
file.rtf_object_000000A7.rawNow, lets inspect the first lines with hexdump -C file.rtf_object_000000A7.raw | head
Result:
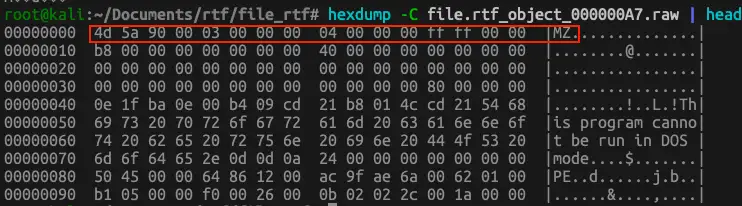
Interestingly, when you look at the magic bytes you see that we didn’t get an OLE container, but a pure Portable Executable (PE). You can identify them by their magic byte 4d 5a.
Let’s Double check the results with file file.rtf_object_000000A7.raw:
file.rtf_object_000000A7.raw: PE32+ executable for MS Windows 5.02 (GUI), x86-64, 18 sectionsLets inspect our file with strings file.rtf_object_000000A7.raw:
!This program cannot be run in DOS mode.
.text
`.data
.rdata
@.pdata
...
...
If there would be shellcode within the PE file you would identify potential IPs or domains by extracting the strings (as long as the strings are not encrypted).
Disassemble the binary code
Let’s look at the binary from a black box perspective. We want to know what the executible does by performing a very basic code analysis.
In Linux systems there is a tool called objdump that can be used to disassemble binaries. Before you start, check your system architecture with uname -m.
In my case it’s:
aarch64Let’s invoke objdump with:
objdump -D -b binary -m aarch64 file.rtf_object_000000A7.raw
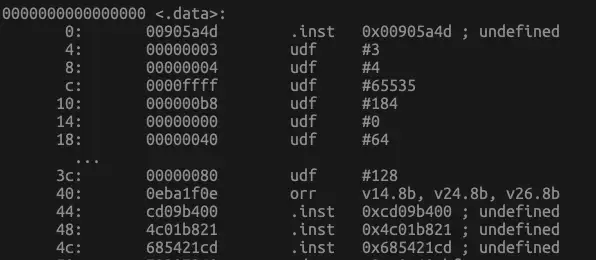
From the result we cannot deduct something useful. The reason is, that I’ve used objdump with the wrong system specifications.
Let’s look at our binary again:

It says it’s an
- Windows Executable PE32
- x86-64
- 18 sections
In order to disassemble x86-64 architecture on an aarm64 system you need another version of objdump:
apt install binutils-x86-64-linux-gnu
Now, we can give it another try:
x86_64-linux-gnu-objdump -d -M intel file.rtf_object_000000A7.raw | less
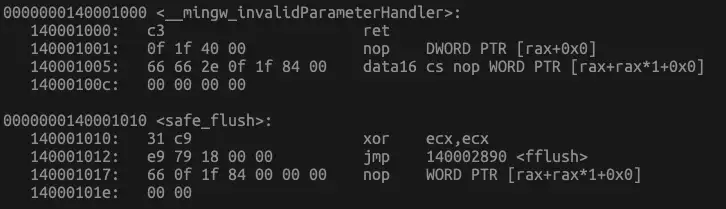
This output looks more promising. You can see different functions with their assembler code. Let’s get an overview of all functions:
x86_64-linux-gnu-nm file.rtf_object_000000A7.raw | grep -i ' t '
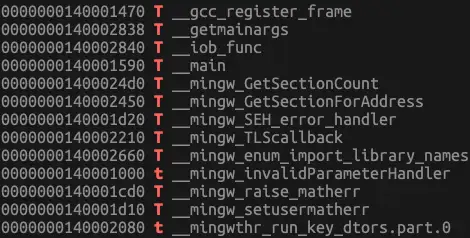
Let’s have a look at the __main__ function:
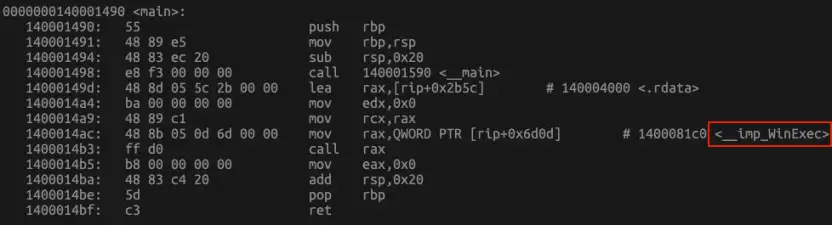
In the __main__ function we see that winexec is used, but as long as we don’t understand assembler code we don’t know exactly what it does.
Decompile binaries
To understand the code we need to decompile it. I use Ghidra, a decompiler that was developed by the National Security Agency.
Open Ghidra on your Desktop -> Create a new project and import our binary target file -> Click on Analyze -> Open the Decompiler window. From here, you can export the decompiled code into a text file and safe it as “*.c”.
Open the C file and search for main().
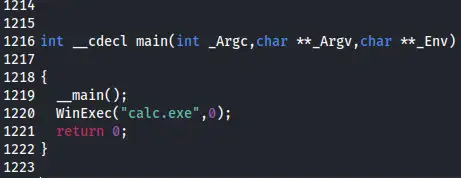
We clearly see that Calculator is triggered.